
Once you’ve finished recording your song and cleaned up any mistakes, it’s time to put the finishing touches on your track.
Final Touches & Exporting
First, make sure your transitions sound smooth and adjust the volume if necessary. Once you’re satisfied, export your track as a single WAV file, then open a new project and import the final track.
Now, let’s enhance your sound with a few essential effects. At this stage, I typically only use EQ and compression, so let’s break them down:
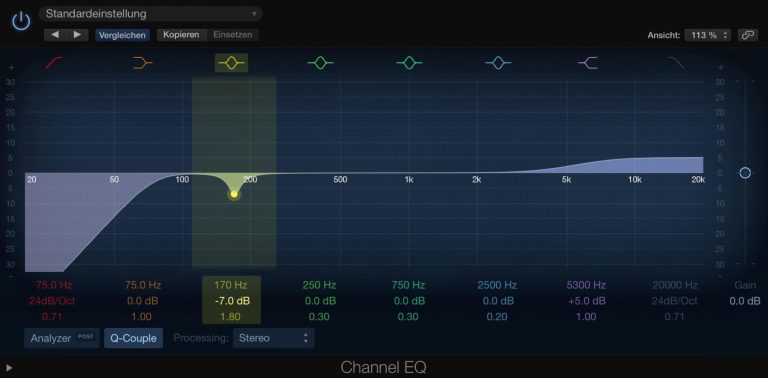
EQ (Equalization)
Think of EQ (equalizer) as a set of audio filters that let you shape the sound by boosting or cutting certain frequencies. You can use it to:
- Reduce bass boominess
- Add clarity and brightness
- Remove harsh or unpleasant frequencies
Basic EQ Adjustments:
 Remove "boominess" → Roll off some bottom end at around 80-100 Hz. Add clarity & "silk" → Boost the 8-10 kHz range for a crisper sound (but don’t overdo it, or you’ll add unwanted noise). Eliminate harsh frequencies → Boost different frequencies temporarily to find the unpleasant ones, then cut them (e.g., cutting 180 Hz can help clean up muddiness).
EQ settings vary for every recording, so tweak until it sounds right to you.
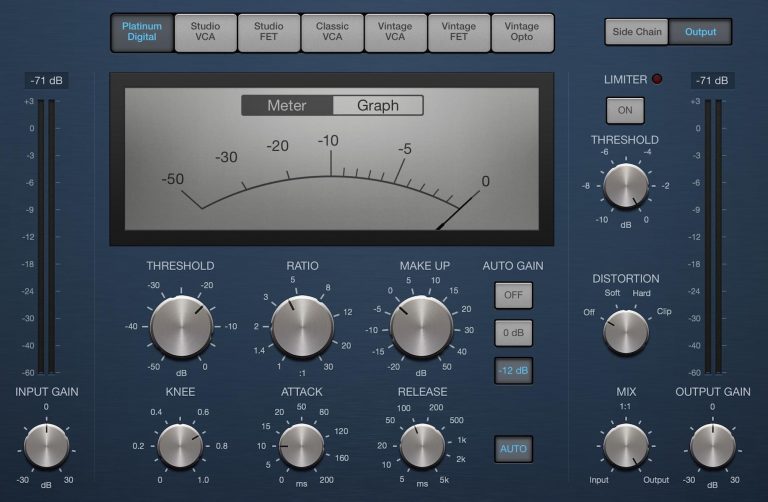
Compression
A compressor helps control the dynamic range of your track—the difference between the loudest and quietest parts. It evens out volume levels by boosting quieter sounds and reducing louder peaks.
For percussive fingerstyle guitar, compression is especially useful to control unexpected peaks, like when hitting the guitar body. However, be careful not to over-compress, as acoustic guitar needs natural dynamics to sound lively.
Compressor Controls Explained:
Threshold → The volume level at which compression starts working. Ratio → How much compression is applied (e.g., a 6:1 ratio means a signal must exceed the threshold by 6dB for the output to increase by just 1dB). Attack → How quickly the compressor starts working once the threshold is crossed. Release → How soon the compressor stops after the signal drops below the threshold. Knee → Determines how smoothly compression kicks in. A Hard Knee applies it instantly, while a Soft Knee gradually applies compression as the signal increases. Make-Up Gain → Boosts the compressed signal to compensate for volume loss. Output → Adjusts the final output volume of the compressed signal.
Suggested Starting Settings:
 Attack: ~10ms Release: 100-200ms Ratio: 2:1 to 4:1 Threshold: Keep it fairly high so the natural dynamics remain.
(Lowering the threshold tightens the sound but reduces dynamics.)
You can also experiment with presets and tweak them to match your style.
Final Tip
Regardless of the method you use, take breaks! Stepping away for a bit helps you come back with fresh ears and make better mixing decisions.